[FortiGate] FortiGateをキャッシュDNSにする
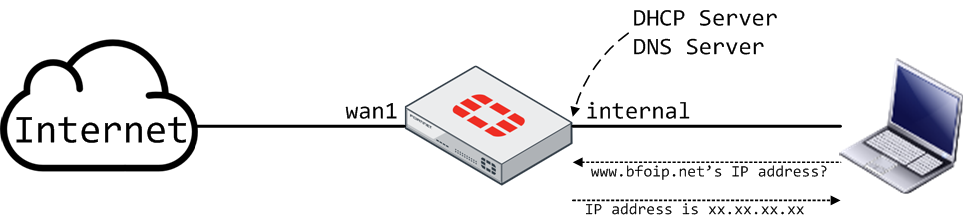
LAN内のPCなどから参照するDNSサーバをFortiGateにする場合の例です。
internalインタフェースがDHCPサーバとして動作し、クライアントに通知するDNSサーバをFortiGate自身にする設定例です。
設定イメージ
作業前確認
Step 0. 作業前確認
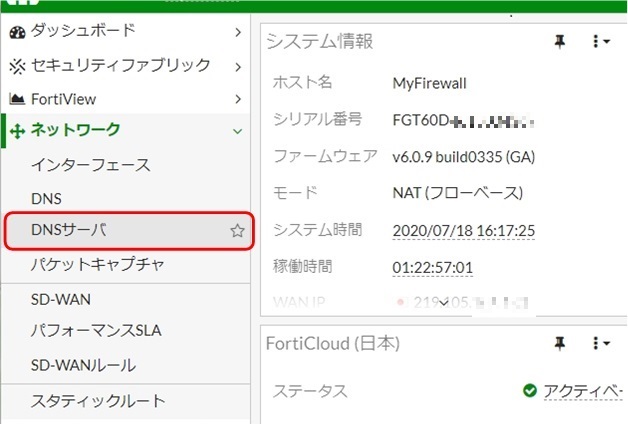
ネットワーク のメニュー内に、DNSサーバ の項目があるか確認
表示がない場合: Step 1 へ
表示がある場合: Step 3 へ
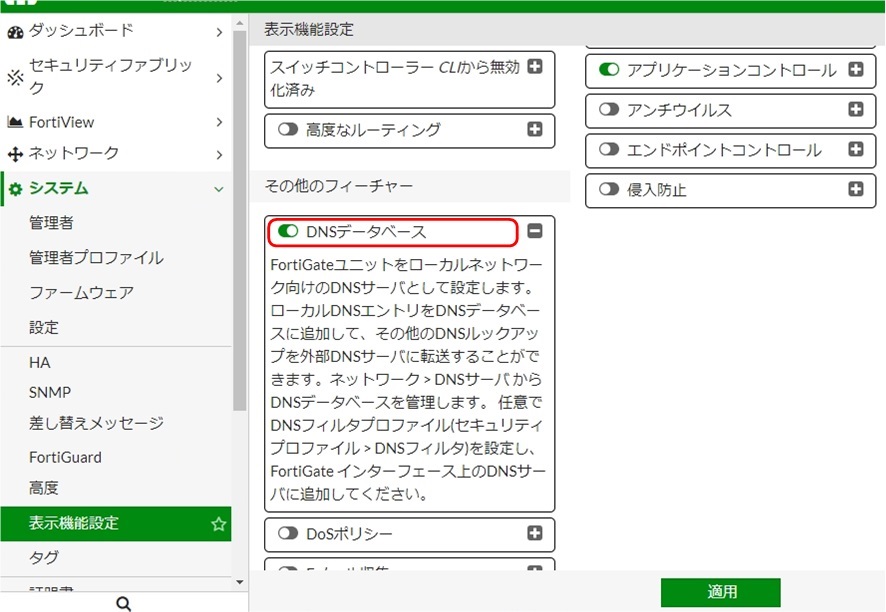
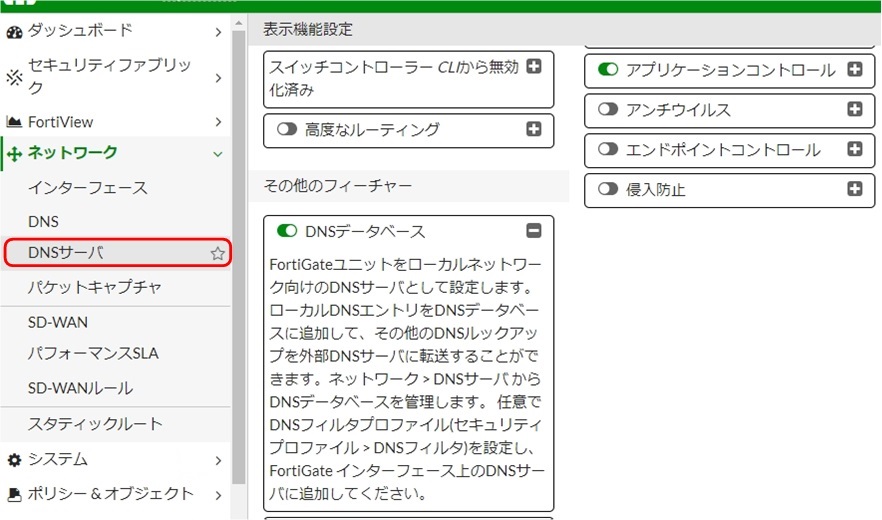
Step 1. システム > 表示機能設定 の順にクリック

Step 2. DNS データベース を有効にし、適用をクリック
DNSの問い合わせ受付けるインタフェースの設定
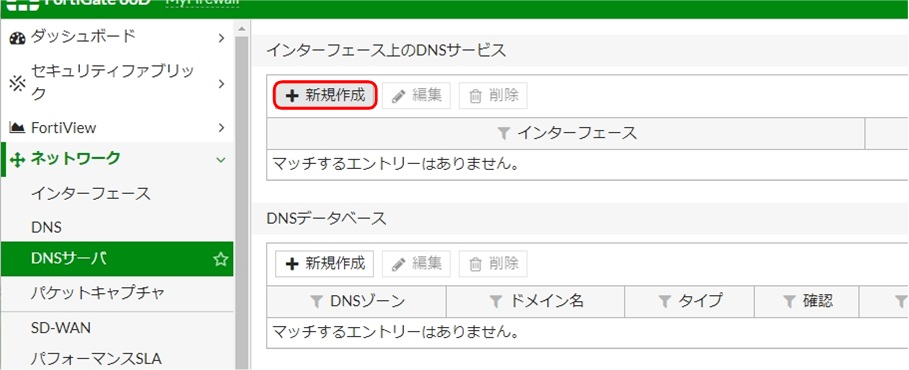
Step 3. ネットワーク > DNSサーバ の順にクリック
Step 4. インタフェース上のDNSサービス の 新規作成 をクリック
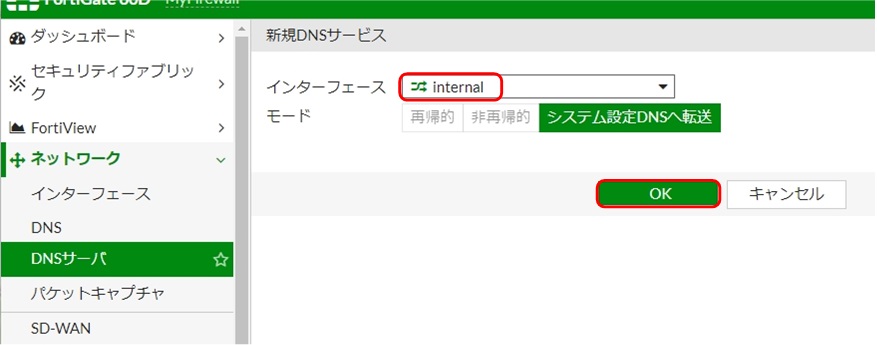
Step 5. DNSの問い合わせを受付けるインタフェースを指定
この例では、internal インタフェースでDNSの問い合わせに応答するようにします。
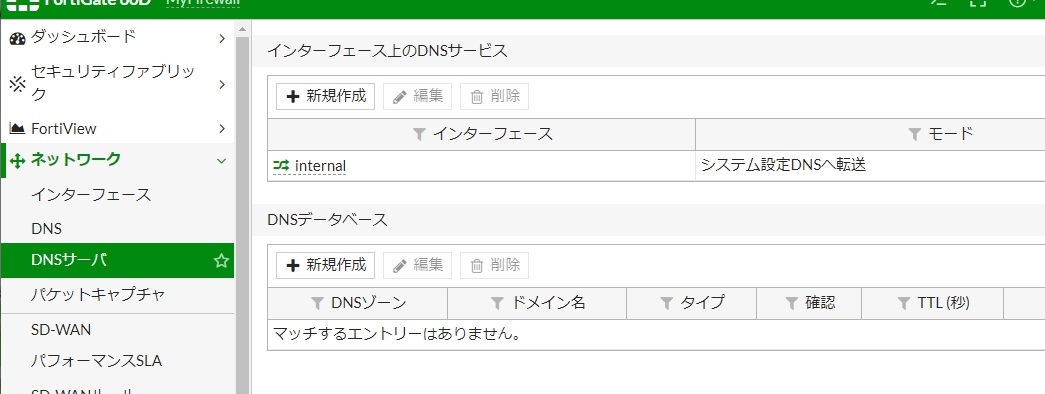
Step 6. 設定が反映されたことを確認
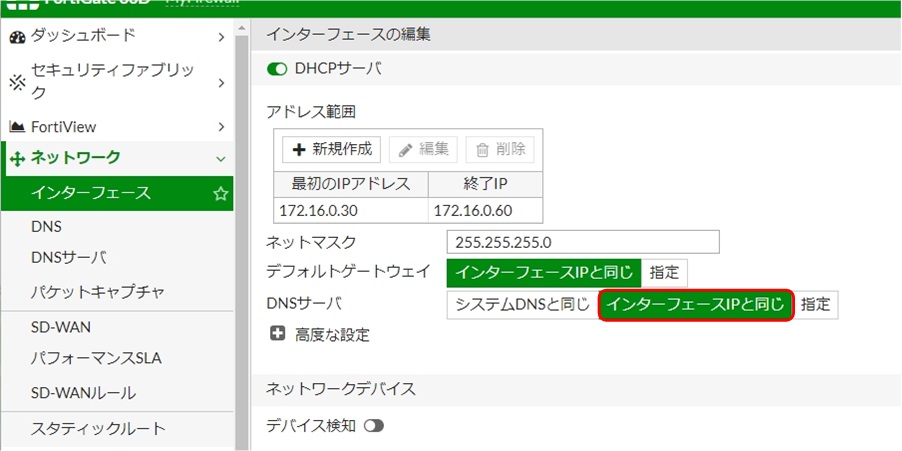
DHCPで払い出すDNSをFortiGate自身に変更する
Step 7. 変更対象インタフェースを選択し、編集 をクリック

Step 8. DNSサーバ の設定を インターフェースIPと同じ に変更し、OKをクリック